+34 620 10 75 37info@nanbiosis.com

Posts Taged microdroplet

NANBIOSIS U16 enlarges its capacities with a new FlexPS-ARPES-E kit

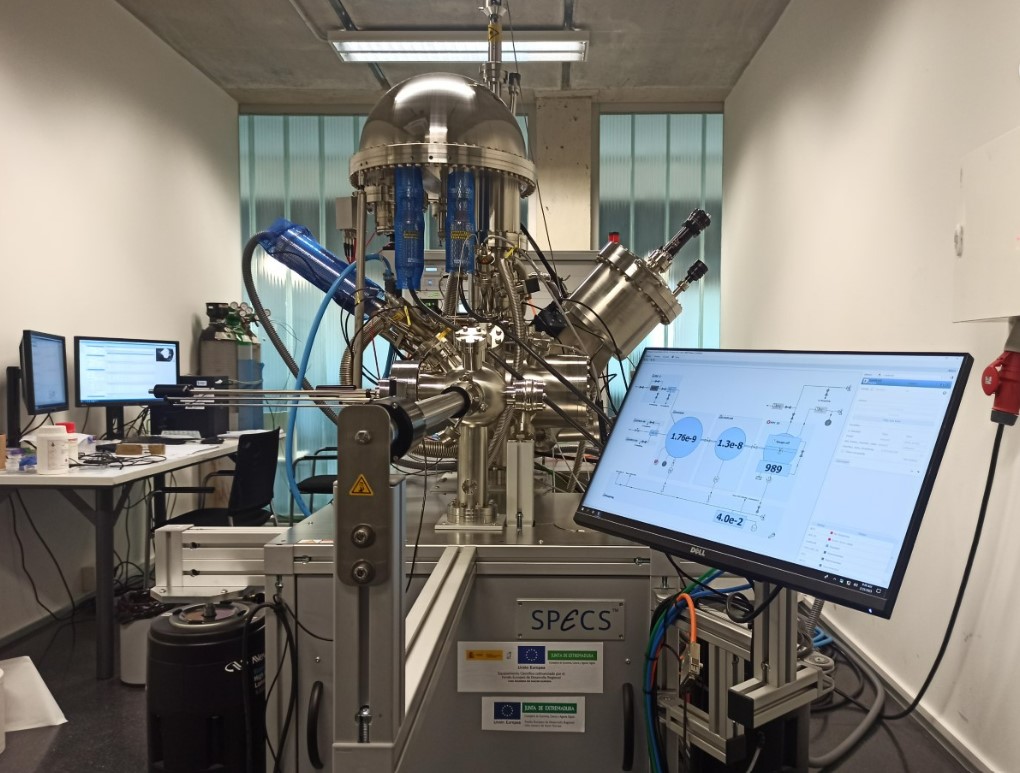
NANBIOSIS unit 16 Surface Characterization and Calorimetry Unit form CIBER-BBN and University of Extremadura has recently incorporated new equipment acquired through the execution of the project FICTS1420-14-09, cofinanced with FEDER funds, the Ministry of Economy and Competitiveness and Junta de Extremadura, Regional Ministry of Economy, Science and Digital Agency. A new FlexPS-ARPES-E kit, manufactured by SPECS, is now available for use by researchers

This new resource uses the technique of photoelectron spectroscopy generated by X-rays to analyze the chemical composition of a surface. The electrons given off by the irradiated surface generate a fingerprint of the molecules that make up that surface, yielding information about the chemical composition of approximately the first 10 nm (one millionth of a millimeter) of thickness, making it a technique of Last generation.

One of the advantages of the acquired equipment is that the type of analyzer it has allows for different configurations to obtain different measurement modes. Thus, depending on the application, you can choose between:

XPS/ESCA (X-ray Photoelectron Spectroscopy) mode: The excitation source is X-ray.

SEM/SAM (Scanning Electron Microscopy/Auger) mode: the excitation source is electrons.

UPS mode (Ultraviolet Ray Photoelectron Spectroscopy): The excitation source is UV rays.

ISS (Ion Scattering Spectroscopy) mode: the excitation source is ions. This excitation source can also be used for depth profiling.

At a cost of 800,000 euros, its acquisition has been achieved thanks to financial support from the Ministry of Science and Innovation, the General Secretariat for Research and FEDER funds from the multi-regional operational program of Spain in the line of action of Singular Scientific and Technical Infrastructures ( ICTS). In addition, it has been co-financed by the Junta de Extremadura, the Ministry of Economy, Science and Digital Agenda and the General Secretariat of Science, Technology, Innovation and University.

Other equipment financed in this same action is:

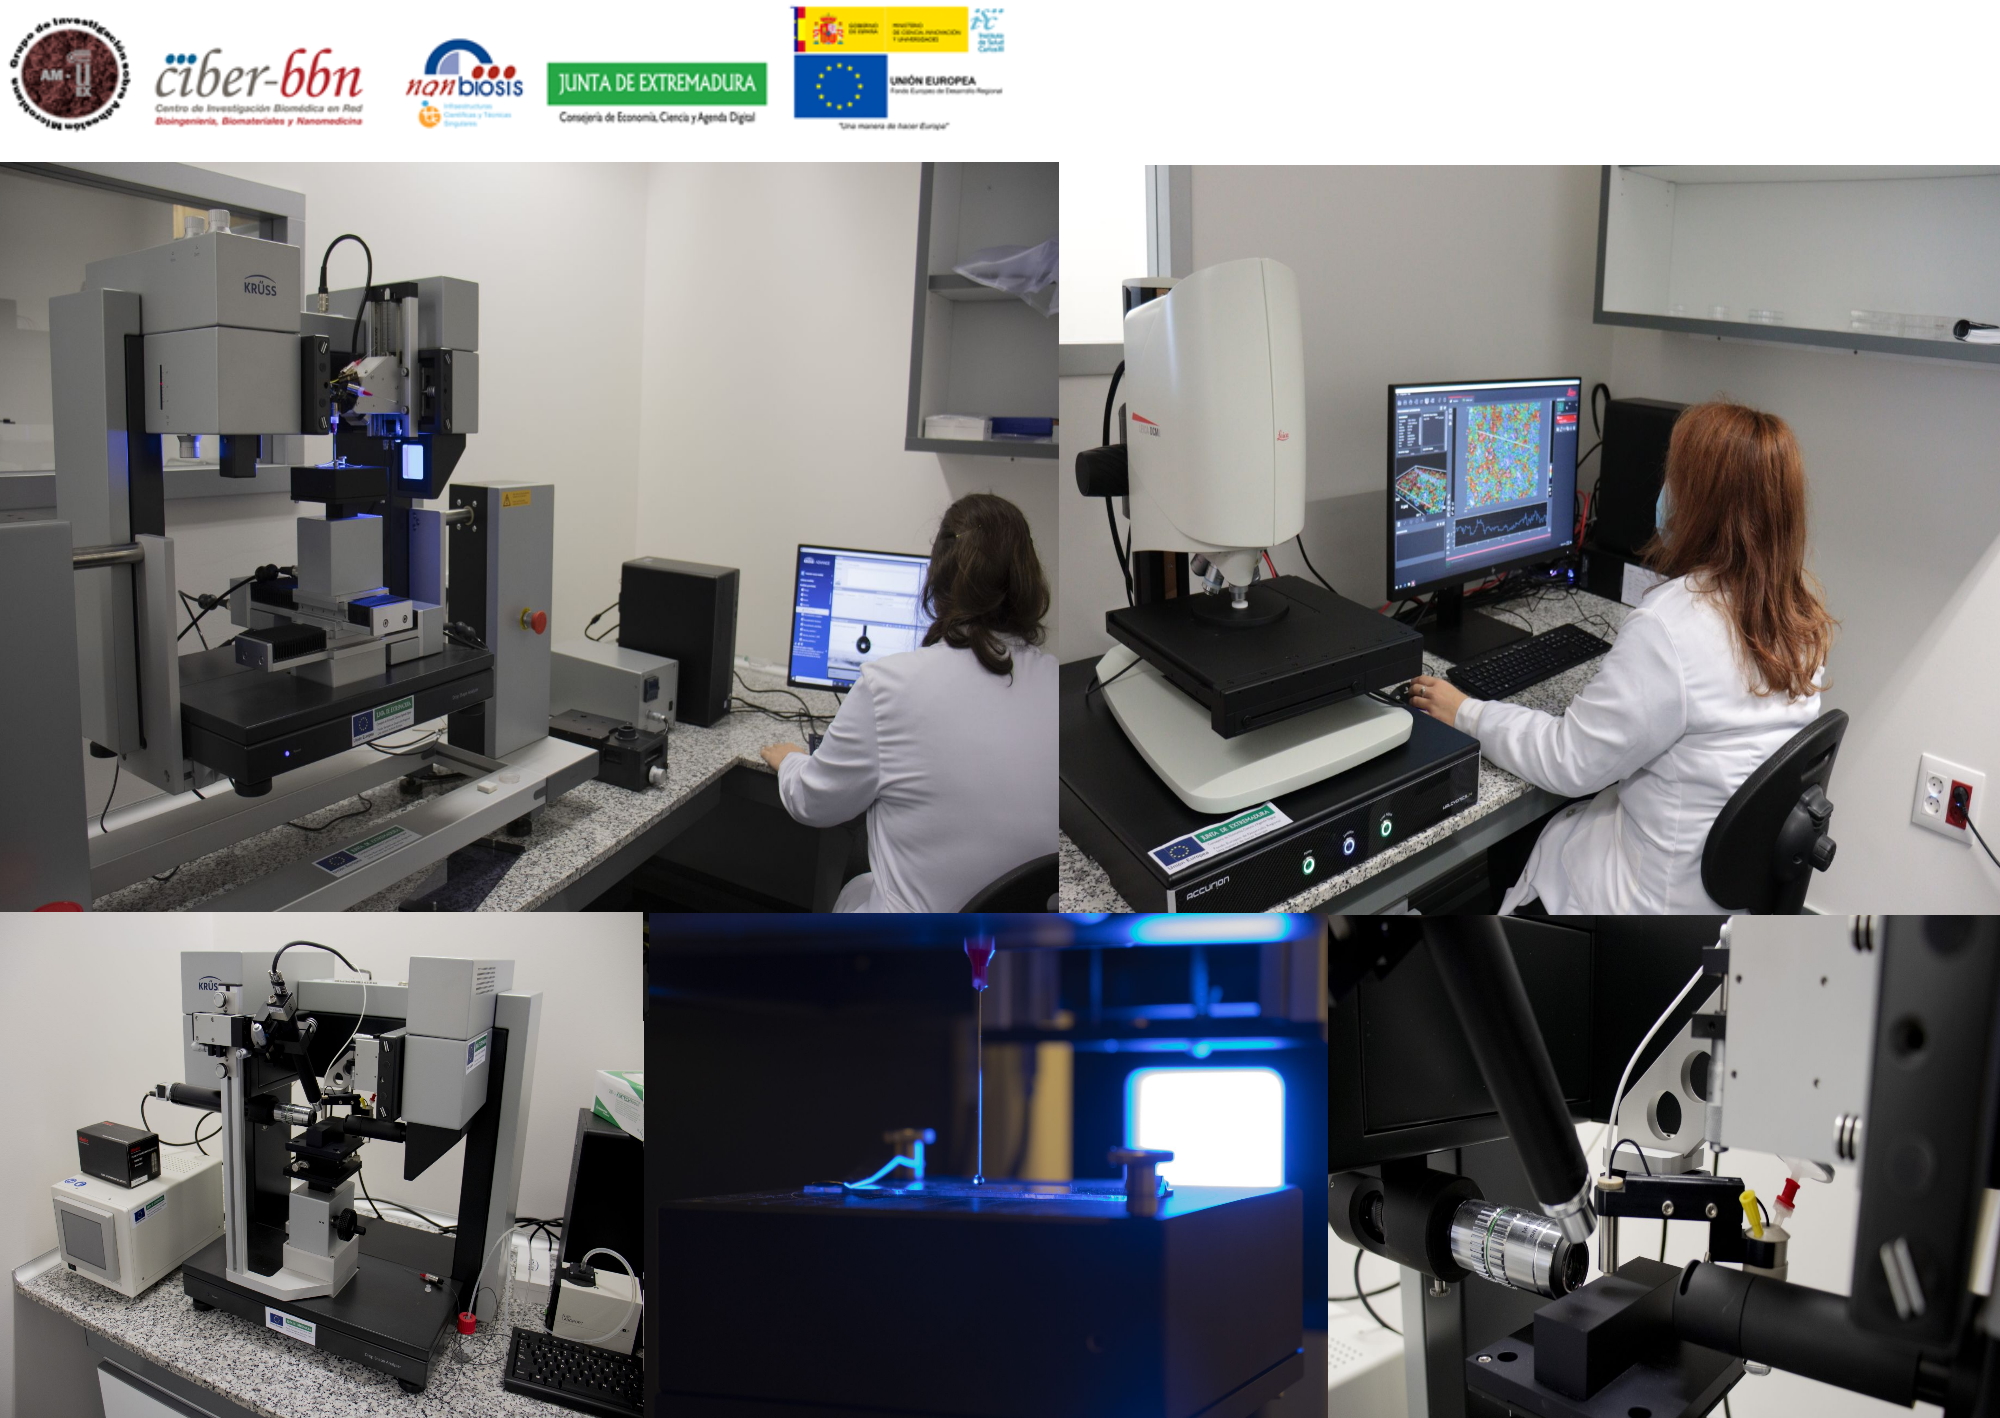
A DMC8 Leica profilometer: a device that allows determining the 3D texture of surfaces through spatial, volumetric and height parameters, from the millimeter to the nanometer range.

A Krüss DSA100E/ DSA100M goniometry : system for determining the surface tension of solids and liquids. The equipment has a microdrop dosing system, a thermostatic chamber and a chamber for controlling the vapor saturation of the liquids being analysed. In addition, the microdroplet system has a tilting base that allows the samples to be tilted by at least 90°.

An additional cannon for a team of TOF-SIMs: a team of secondary ion mass spectrometry by time of flight (TOF-SIMS), a very sensitive technique for analyzing the composition of surfaces that provides detailed elemental and molecular information of coatings, layers fine lines and interfaces both at the superficial and three-dimensional level.
Read More

New equipment for calorimetry and surface characterization for NANBIOSIS U16

NANBIOSIS unit 16 Surface Characterization and Calorimetry Unit form CIBER-BBN and University of Extremadura offers the performance of tasks of physical-chemical characterization of surfaces using techniques such as ellipsometry, calorimetry, X-ray photoelectronic spectroscopy (XPS) and detection of secondary ions by means of mass spectrometry by time of flight (Tof-SIMS). Recently, new equipment acquired through the execution an investment of 1.3 million euros, cofinanced with FEDER funds, the Ministry of Economy and Competitiveness and Junta de Extremadura, Regional Ministry of Economy, Science and Digital Agency, througth the project FICTS1420-14-09. These equipments are a microdroplet and picodroplet contact angle goniometry system and an optical profilometry system.

Equipment acquired

PEAK AND MICRO DROP GONIOMETRY SYSTEM

This system allows to measure contact angles automatically, controlling by software, the deposition of drops of different liquids, their analysis and the orientation of the substrate, as well as pending drops. In addition, the microdroplet system has a tilting base that allows the samples to be tilted by at least 90o. It also includes a thermostatic chamber, for temperature changes of the sample with a range between 5 and 90 ºC, and a chamber for humidity control.

Obtaining surface tension, through contact angle measurements, is a factor to consider in technologies of biomedical interest such as implants and other materials that must be in contact with biological fluids. In these systems the contact angle is related to the wettability, the hydrophobicity of the surface and the adhesion capacity of substances such as proteins or other compounds on the surfaces.

In the case of pico-droplet measurements, the system allows to very precisely dose drops much smaller than in the previous case, which can be as low as 20 picoliters, as well as to analyze their shape to measure the contact angle. This fact solves the problem of measuring wettability in very small structures, such as capillaries, microchips, joints created in the union of two materials, etc.

PROFILOMETRY SYSTEM

The system allows the roughness of a multitude of surfaces to be measured by an optical method that does not make any changes to the sample. With the operating base of a confocal microscope commonly used in different fields of science, it allows to create high-resolution 3D images quickly and automatically, as well as obtaining color images thanks to the use of three LEDs: Red, Green and Blue. With the available objectives, it is possible to measure from more macroscopic samples such as screws used as dental implants to be able to observe bacterial colonies composed of bacteria the size of a micron. This will make it possible to measure the roughness of any sample covering the range of roughness between a magnifying glass, which gives a more macroscopic view, and the atomic force microscope capable of measuring nanometric roughness (10 ^ -9 m). In addition, this equipment also works as an interferometer that allows to measure the roughness with greater precision of mirror polished samples in a simple way, obtaining images of higher resolution than any confocal technique.

Read More